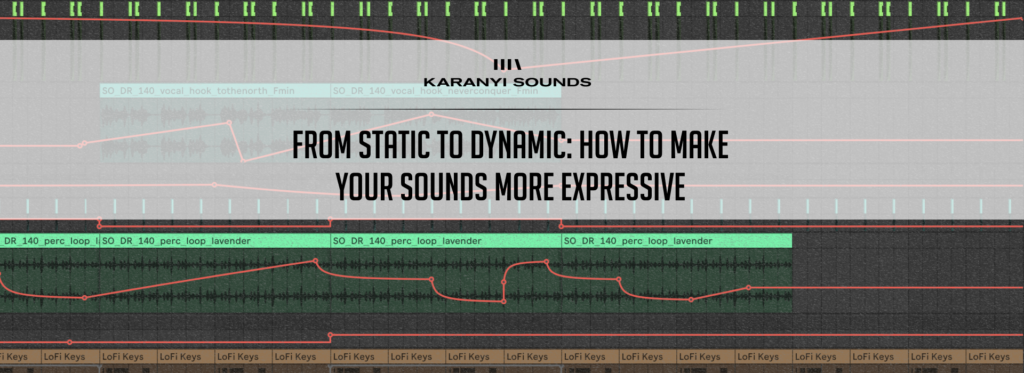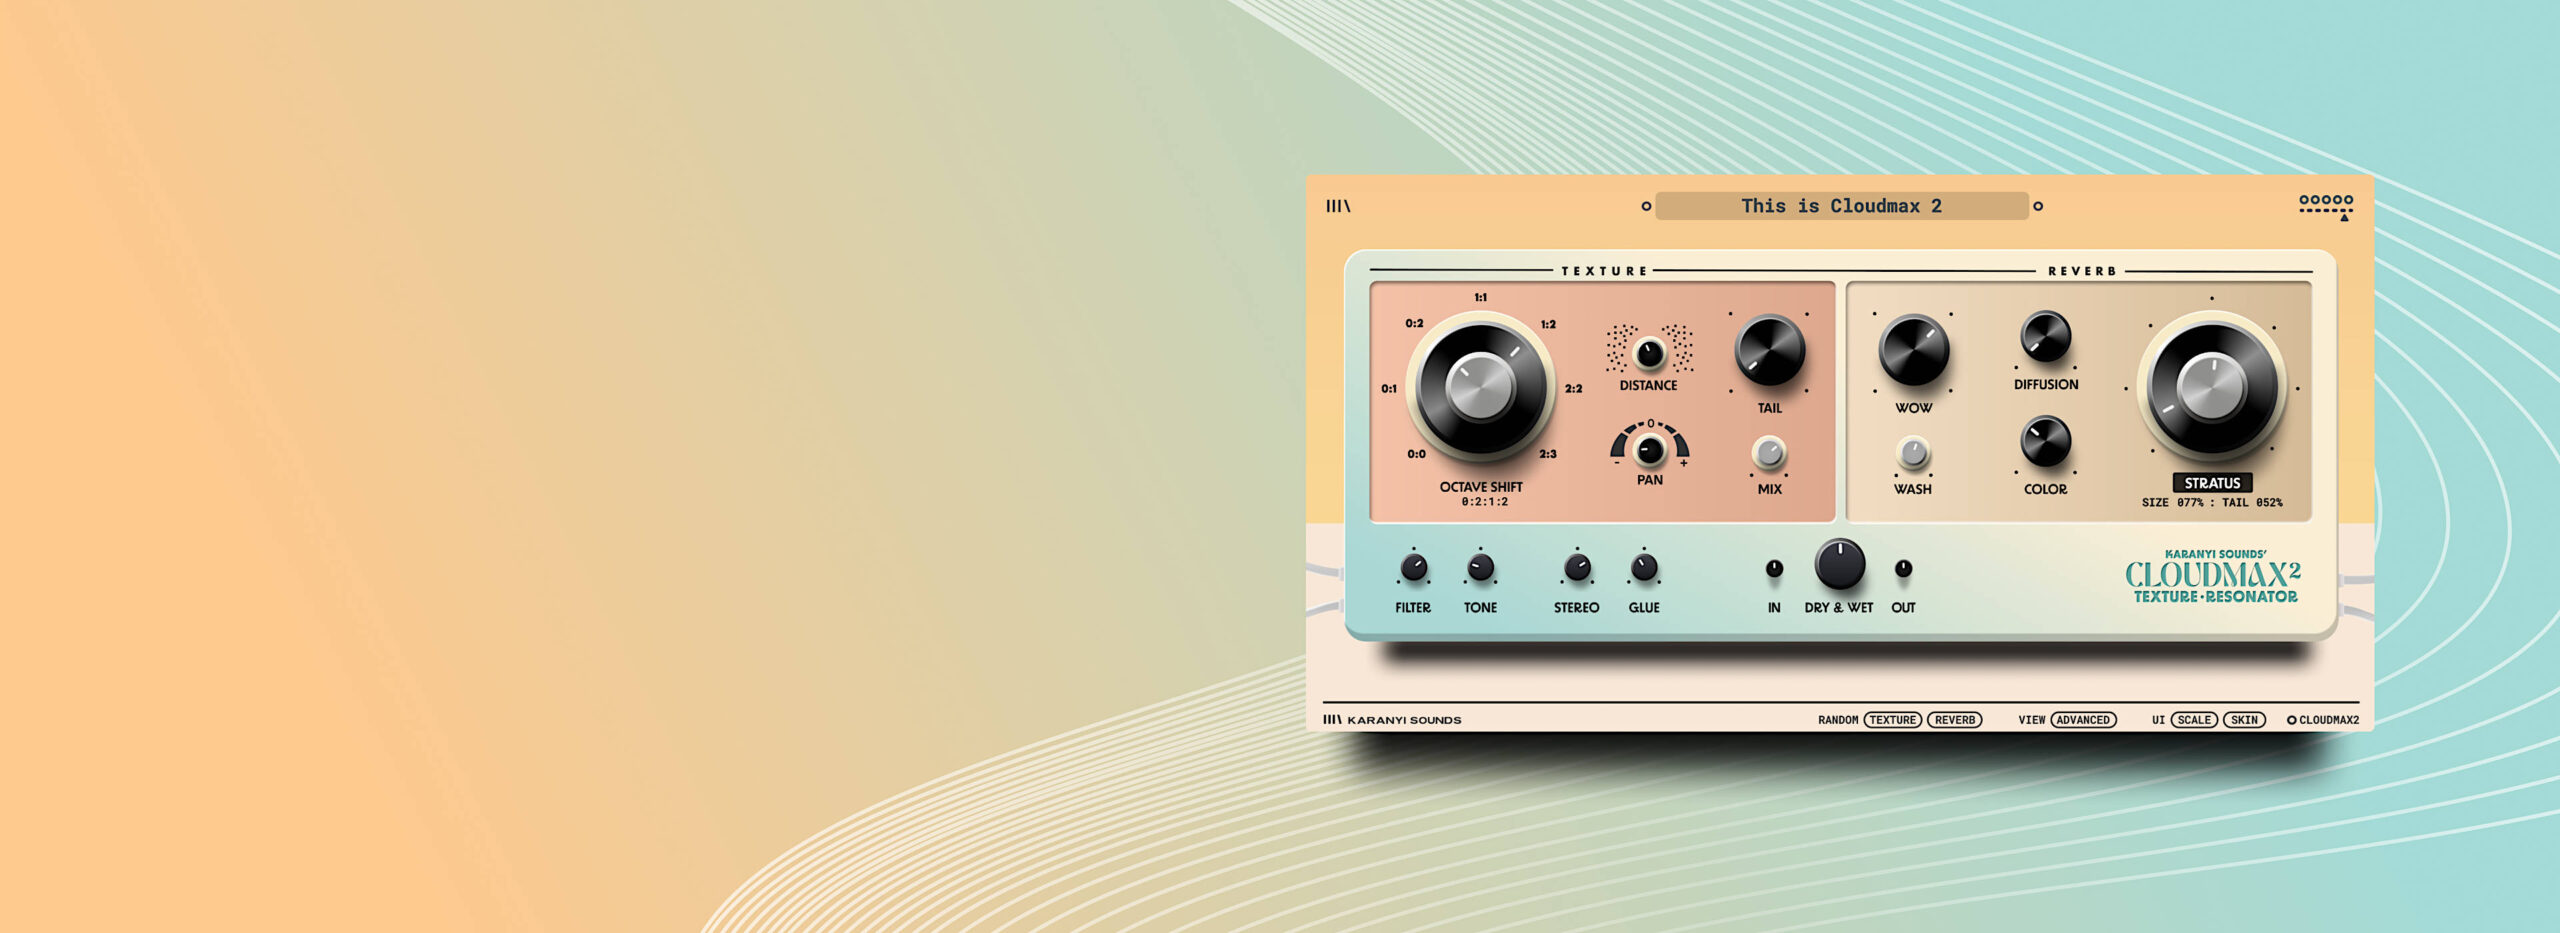
Cloudmax 2 Owner’s Manual
June 10, 2001First of all, thank you for choosing our effect plugin!
CONTENTS
System requirements
Download / Setup
Installing Polyscape Nova (Mac / Windows)
Uninstalling Polyscape Nova (Mac / Windows)
Brief overview of the controls
SYSTEM REQUIREMENTS
| macOS | Windows |
| Mac OS X 10.11 or higher is recommended 4 GB of RAM, 8 GB is recommended 2 GHz CPU with at least 4 cores 64-bit DAW/host 0.1 GB free disk space | Windows 8 or higher 4 GB of RAM, 8 GB is recommended 2 GHz CPU with at least 4 cores 64-bit DAW/host 0.2 GB free disk space |
SETUP
Downloading & Getting Your Serial Number
After you successfully purchase Cloudmax 2, you will receive an email with your product’s download link and a unique serial number. To download your installer and get your activation number, please do the following:
- Log in to your Karanyi Sounds account and go to My Account’s Downloads page.
- On your Downloads page, search for Cloudmax 2, and you will find your unique serial code. You will need this serial number to activate your product the first time you run it.
- Download your version of the plug-in (Mac or Windows)
Installation (Mac)
- Download the related file from your account: “Cloudmax_2_Installer.1.0.0.pkg”.
- Run the installer, which will paste the plugin to the default folders as follows:
VST3: Library/Audio/Plug-ins/VST3/
Audio Unit: Library/Audio/Plug-Ins/Components/
AAX: /Library/Application Support/Avid/Audio/Plug-Ins - Open your host DAW and find Cloudmax 2. When you first run it, it will ask for a serial number. Enter your serial number to activate the effect. The serial number can be found in your karanyisounds.com account. If you have any trouble with your serial number, please contact our support!
Installation (Windows)
- Download the related file from your account: “Cloudmax_2_Win_Installer.exe”
- Run the installer, which will paste the plugin to the default folders as follows:
VST3: C:\Program Files\Common Files\VST3\
AAX: C:\Program Files\Common Files\Avid\Audio\Plug-Ins - Open your host DAW and find Cloudmax 2. When you first run it, it will ask for a serial number. Enter your serial number to activate the effect. The serial number can be found in your karanyisounds.com account. If you have any trouble with your serial number, please contact our support!
Uninstall (Mac)
- Ensure both Cloudmax 2 and your DAW are closed.
- Find and delete the following folders and files on your system:
VST3: Library/Audio/Plug-ins/VST3/Cloudmax 2.vst3
Audio Unit: Library/Audio/Plug-Ins/Components/Cloudmax 2.component
AAX: /Library/Application Support/Avid/Audio/Plug-Ins/Cloudmax 2.aax
Other files: /Users/(YOUR USER NAME)/Library/Application Support/Karanyi Sounds/Cloudmax 2
IMPORTANT: AppData and Application Support folders are hidden by default,
you need to make sure you see hidden folders.
Uninstall (Windows)
- Ensure both Cloudmax 2 and your DAW are closed.
- Find and delete the following folders and files on your system:
VST3: C:\Program Files\Common Files\VST3\Cloudmax 2.vst3
AAX: C:\Program Files\Common Files\Avid\Audio\Plug-Ins\Cloudmax 2.aax
Other files: C:\Users(YOUR USER NAME)\AppData\Roaming\Karanyi Sounds\Cloudmax 2
IMPORTANT: AppData and Application Support folders are hidden by default,
you need to make sure you see hidden folders.
BRIEF OVERVIEW
TEXTURE SECTION – FRONT VIEW
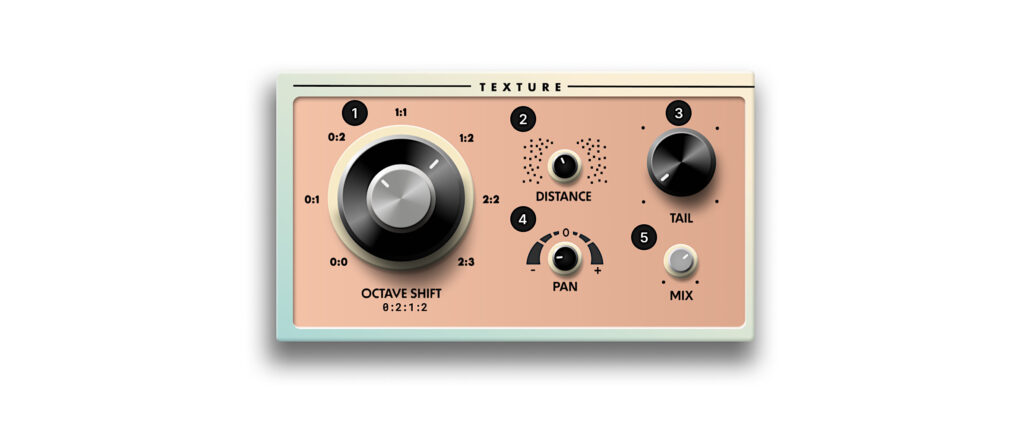
- Octave Shift – You can shift the octave of the granular engines by up to +3 (and even -1). The first number refers to the octave of the 1st / 3rd engine, while the second number refers to the octave of the 2nd / 4th engine depending on which knob you turn. TIP: Use different octaves for the engines, e.g.: 2:3 and pan the effect hard in the stereo field (see #4) for a wide texture effect.
- You can set the distance of the granular engines (i.e.: the volume mix of the 4 engines relative to one another) to taste.
- Grain tails are controlled here with an added delay function. Keep it short for crispy sounds, adding tails will blur the grains.
- Pan controls the stereo placement of all the 4 granular engines with a macro. At 0, they are all placed in the middle, while moving the knob left or right will spread them in the stereo field.
- Mix sets the volume of the 4 grain engines together. At zero position (fully left) All of them are on mute, while at maximum they are on full volume.
Please note that controls on the front view overwrite the control positions on the advanced view!
TEXTURE SECTION – ADVANCED VIEW
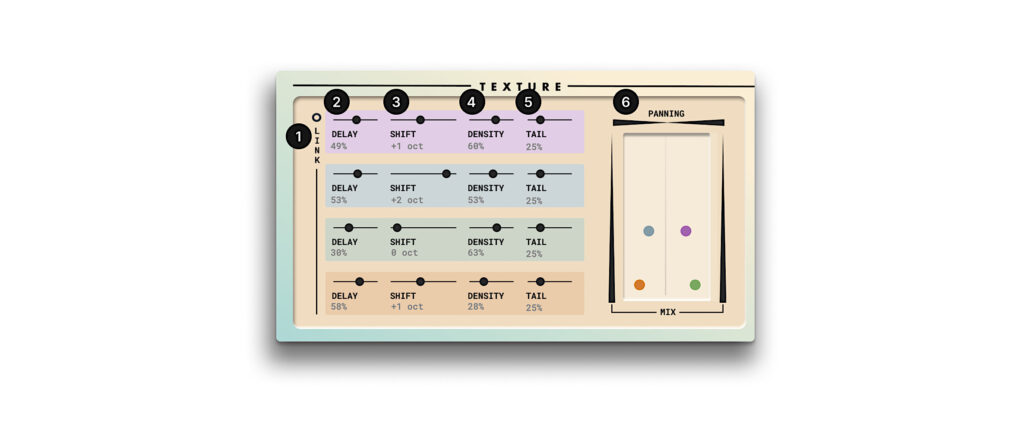
- Link button to control all the 4 layers together
- Start delay to control, when the grains should take effect relative to the dry signal input
- Shift controls the pitch of the grains. You can set them from -1 octave to +3 octaves, including some harmonic semitones)
- Density sets the thickness of the grains
- Grain tails are controlled here with an added delay function
- Mix simulates the listening environment: move the dots representing each grain module to the bottom for full volume and move them up for make them quieter. Place them right or left to move them in the stereo field
REVERB SECTION – FRONT VIEW
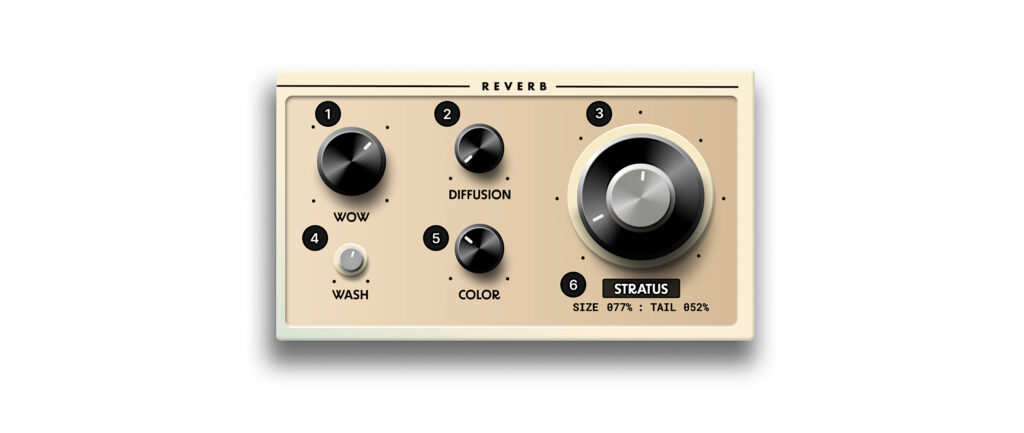
- WOW adds a tape-like instability to the reverb tail, similar to a pitch modulation.
- It controls how many echos are generated and how they are separated from each other.
- This double control sets the length and the number of repeates of the delays in the reverb algorithm
- Wash works as a pre-verb to blur the transients of the incoming signal.
- Color adds a retro damping effect that diminishes the high-frequency content, similar to vintage reverb units.
- Here you can choose between our two custom reverb algorithms: Cirrus and Stratus
REVERB SECTION – ADVANCED VIEW
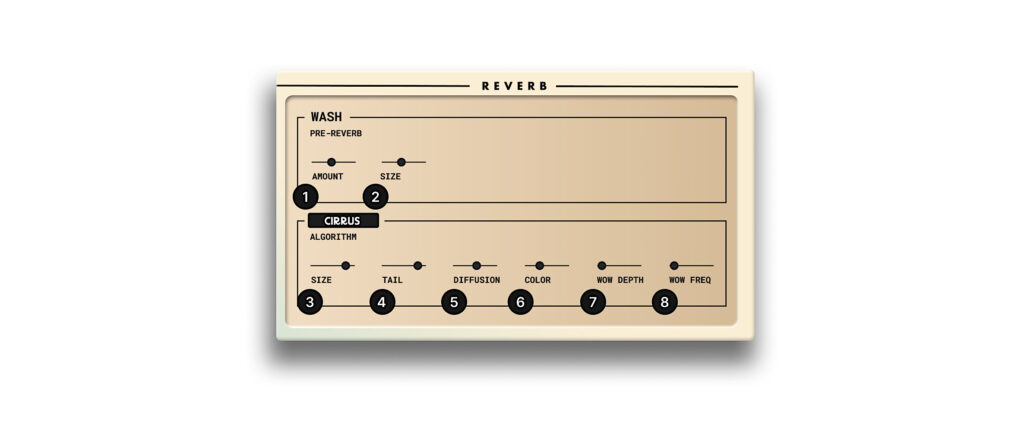
- Pre-reverb amount is controlled here
- Pre-reverb size is controlled here
- Reverb size is controlled here
- Reverb length is controlled here
- It controls how many echos are generated and how they are separated from each other
- Color adds a retro damping effect that diminishes the high-frequency content, similar to vintage reverb units
- WOW adds a tape-like instability to the reverb tail, similar to a pitch modulation. Depth controls the modulation amount
- The frequency of the modulation is set here
MIXING CONTROLS

- These tools helps you fit the sound of Cloudmax 2 into your music seamlessly. Filter is a highpass/lowpass combi filter to cut unwanted frequencies. Tone is a delicate tonal eq to boost / attenuate certain frequency ranges. Stereo control is very helpful to decide whether you want your wet signal wide or narrow in the stereo field. Glue is a simple compressor to reduce peaks.
- Volume and main dry/wet balance are set here
OTHER CONTROLS
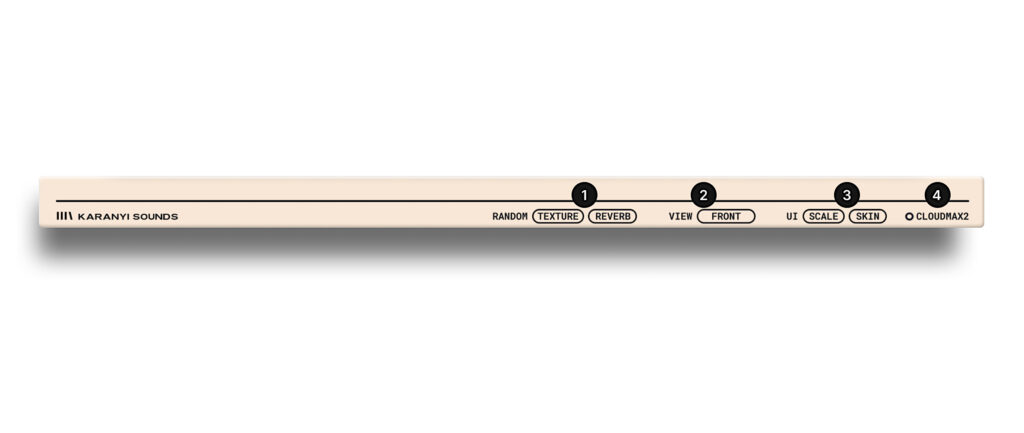
- A simplified version of our Smart Random Technology is here to easily get new inspiration. You can separately randomize the texture and the reverb modules.
- Choose between the inspiring “front”, or the in-depth “advanced” views.
- UI settings are here. With “scale”, you can enlarge the UI. With “skin”, you can select from 4 available skins.
- This is where you can choose between “on” and “bypassed” modes.
Big thanks from all of us for adding Cloudmax 2 to your collection. We’re excited for the unique sounds and musical journeys it’ll bring you! – Your friends at Karanyi Sounds